Monday, August 12, 2013

So It's Been A While


Over the last few weeks I've figured out a few things that I'm not so good at. Things like: painting, caulking, nailing, sanding and blogging. Actually, the only thing about this project I've been good about is the demolition part of it... mostly because I'm just good at screwing things up. And by "things" I don't mean sheetrock because I'm bad at that, too.

The good news is that we've made a lot of head way and I've been learning a lot. Just because I'm bad at it doesn't mean I'm not getting better. Think of a kid playing piano at his first recital. Deafening noise - but hey, it's cute cause he's trying, right??

It's been so long that I forgot where I left off. We installed the beams and took the temp walls down and it ended up looking like this:


After that we still had the minor issue of wires hanging down, which was fun because you never knew which one was live so it made walking through the house more interesting. Actually it wasn't that bad and I learned a ton about how all of that works when we relocated most everything through the attic. 


As far as electrical jobs go, I'm told this was relatively simple. It was just a pain to deal with because attics are generally hot places. The electrician came and did a lot of the wiring, adding switches and outlets where we needed and to generally give us a thumbs up for the inspector so that we could close the walls in. We did a lot of the tough stuff like dig through the foundation so that we could run electricity to the island.


We also had to move the location of the floor outlet which required another 4 to 5 foot trench. I didn't get pictures of that. 

Here's a picture of the island frame which needed to be build around the cabinets to support the slab of granite on top. We also need it to run plumbing and electricity through the back of the cabinets.


In other news, we got gas run to the house, which was interesting to see. They bore a hole from the street directly to the house to the spot where we had the gas line installed into the house a few weeks ago. 


I didn't get a picture of the actual boring. I told you, I'm bad at blogging.

We also picked out floors from iFloor.com. They were delivered by the next week by truck. The truck is too big to make it down the driveway for a front door drop off, so the plan to put all four pallets of floors on the trailer seemed like a good idea. It was a bad idea. First it took almost an hour for the driver to maneuver his pallet dolly to get the load onto the trailer. Second of all, we could only realistically fit one pallet on. So he ended up leaving one on the trailer and the rest on the street. It was about 98 degrees that day so moving 2,200 square feet of floors down the driveway was not fun. 


Our neighbor was nice enough to come give us a hand.

Once the floors are in it's going to look great. With the electric relocated and the framing, plumbing and electric inspections complete, we were ready to start putting sheetrock up. Let me start out by saying that I'm not great at even hanging sheetrock. My father-in-law can hang, tape, float, sand, texture and paint... but he's one man so it would have taken a LOT of time. So we called a couple of sheetrock guys in to come do the job. After three days they still hadn't showed up and by the third day we had done much of the work ourselves.


WALLS! Speaking of walls, the last few weeks (even before I forgot to keep blogging) El has been working hard on picking a color. It started off innocently enough with a sample or two, you know, just to see how it looked on the walls. It ended with a rainbow of colors across every paintable surface in the house, combining to create a patchwork of art where ever the eye would turn.


She finally picked a color. And guess what? It was the FIRST color that she picked. At least the paint guy at the Home Depot wasn't bored.

Walls were actually painted today... I'll have those pictures up soon enough. El and her mom have been working hard on sanding, priming, painting and caulking all of the trim, door frames and doors. We're doing an off-white because the brown has to go. We removed the carpet from the master bedroom and it's size is perfect for rotating all 24 doors in the house to prepare them for painting. We call it the door shop...


I had to go to a week-long meeting at my company's headquarters in Phoenix last week - so I didn't get a chance to have any fun. I WANT TO GO BACK!

The only other big thing that we got done was the cabinets. We shopped a long time for cabinets and the options pretty much boiled down to Home Depot / Lowes cabinets, which were expensive and not 100% wood; Cabinets from a cabinet company which were solidly built, but not very customizable... still as expensive as the previous; or custom made cabinets by a guy who lives near us, also expensive - which I guess makes me the cheap guy who doesn't like to pay good money for a place to store our kitchen crap. Anyway, Jimmy the cabinet guy did a fantastic job making our cabinets exactly how we wanted them. One of the upper cabinets to the left of the stove wasn't painted - that should be done early next week, but you can do your best to imagine them there.


I'll try my hardest to keep this thing updated. Now that we're getting to the end of it the progress should be more visible. 


Monday, July 15, 2013

A Quick Update


The walls are down and beams are up... Finally. Here's how it went down in a nutshell:

On Friday we took a steel pipe, that El's brother was able to find us, to a metal shop in Isabel, LA. They cut the pipe to size and made a 8" x 8" steel plate to weld to the bottom. We brought a pre-fabricated plate to attach the beams to the column and that was welded on the top. 


Cutting the pipe.

The next morning we started early on removing the rest of the wiring and switches from the wall and built two temporary walls, since the wall we're removing is carrying the load of two separate parts of the house.

Nine 2x6's attached to the ceiling joists held the
ceiling over the living room.

A second wall in the foyer was built to
carry the load of the other side of the house.

With both walls up, we were able to install the first beam. We finished at midnight - the temp walls would be taken down the next day...


One wall down; one to go.
 I have to admit, I didn't help much building the second wall. I was busy removing the carpet from the bedrooms and also digging a trench from the kitchen wall to where the island is going. I got about 9" before passing that job on to El's mom, who drilled about 800 holes in the concrete so that it will be easier for me to break up with the compression hammer. We also decided to relocate the floor outlet about 4.5 feet closer to the kitchen... yay more concreate breaking.

The second wall only had to be supported on one
side.


Going, going, gone...


Success! One weekend and both walls are down. The only thing that needs to be removed now are those two temporary studs that sit between the foyer and the dining room, next to the column/post. We'll actually support that load with a short beam running above the ceiling, so the only thing hanging below the ceiling line will be that one long beam pictured above. I'm really excited about working more in the attic where it's 120 degrees... 

I'm ready for this project to be over. We're almost done. We just need to finish breaking the slab for the electric, finish the plumbing and electric in the kitchen, sand the door trim in the whole house, hang, tape and float sheetrock, paint, install baseboards, install new floors, install moulding, install the cabinets and countertops, put in the new exhaust for the range hood, remove the old chimney from the roof and when that's all finally done, pack all of our stuff and move into the house and that's it.

Thursday, July 11, 2013

A Bunch of Messy Projects


It's been a while since I've updated and a lot has been going on, although it doesn't look like we've done much. Last week we were able to pull the fireplace out, which came out faster than I thought but I was not prepared for how dirty of a job it was. I wish I would have remembered to get pictures of the insulation, soot and baby bird skeletons that got stuck in the vacuum cleaner hose. But we got the job done and that's what counted. Moving the fireplace out of the way definitely opened the space up more and gave us a clearer picture of what it's going to look like when it's done.


The only issue we have now is what to do with the chimney stack that's still going through the roof. We decided that the best idea was to hang a Home Depot bucket from the end of it to make El and her mom think we were doing a half as job - which was funny to us; but not to them. 

It's still there. It's still funny.
We didn't finish doing that until almost midnight, so when I got home looking like I did of course El had to get a picture for us to remember. I'm tired.


By the way, if anyone wants a fireplace let me know. I'll give it away if you want it... since apparently Craigslist does not.

With the fireplace out of the way (or at least relocated to the back yard) we were able to install new 2 x 12 beams that span the length of the living room from the front to back. Getting this in took another night and it allowed us to remove almost all of the wall that previously separated the living room and kitchen.


The next messy task at hand was the floors. We finally got the tile up in the living room, hallway and kitchen area. It was a grueling task that I wouldn't wish on my worst enemy. It was dusty and hot and horrible in every way and it was the worst part of the entire project.... until we had to remove the tile thinset from the concrete. 

We rented a concrete grinder from the Depot. This awesome tool takes that stubborn and impossible residue that tile leaves behind and magically turns it into tiny airborne dust particles that fill the room, along with every crack and crevice of your home, your nose and lungs, your eyes, your hair... EVERYTHING. It's awful.

To help minimize the dust the suggestion was to get a couple of box fans and place them in windows or doors to suck the dust out. Also, they suggested that we lightly spray the concrete with a little bit of water to keep the dust from getting to be too much. There's also a hose where you can hook up a shop-vac to help vacuum up the dust before it goes airborne. We took all of these very helpful suggestions and here was the result:


Here's the little bastard that caused
this mess.

We started grinding around 8pm on a Wednesday and by midnight we had only gotten about half way through. It was too much so we called it a night and reconvened early on Thursday morning to spend our July 4th in the dusty mist of hell.... that was until "the idea". 

The father-in-law brought his own shop-vac, about twice as big as the one we're using. We were able to take the filter out and get the hose from the old shop-vac and hook it up to the grinder. We connected another hose to the blower part and blew all of that crap directly into the fan that pushed the dust out into the air and onto neighbor's cars and windows and roofs for miles and miles. I wouldn't be surprised if they saw this stuff on weather radars. At one point the wind was such that when we blew it out of the house it went up and over the house and came back down through the front door. Neighbors drove by slow because they thought the place was on fire... I won't be shocked when we don't get any "welcome to the neighborhood" pies. 

Oh well, who cares, we were out of dust hell... until I realized that the vacuum we were using had an electrical short in the hose. This was an easy problem to diagnose. Take notes here... The way you can tell when your vacuum cleaner has an electrical short is this: While you're using the shop-vac, gently rub your hand along the hose portion, typically near the end. If you feel a slight tingle in one spot, immediately take your hand and grab that spot. You'll then feel a jolt run through your hand and up your arm. You'll also hear yourself scream like a little bitch, while throwing the hose across the room as far as you can. That's how I did it anyway. 

I didn't get any pictures of that either. I know, I suck at this blogging thing.

Speaking of taking up floors, we also had to remove the wood floors that previously covered the dining room and foyer. Remember this picture?


Here's the dining room. The floors are a beautiful tongue and groove white oak that were relatively easy to pull up since they were nailed down onto a sub floor. Glue down floors would have been a lot harder to pull up, so we were fortunate.

For me it was almost heartbreaking to pull these up and throw them away. El, on the other hand, had no problem at all.


Here's a before and after pic... although it doesn't look quite as sad since the sub floor is almost the same color as the white oak. 


After we got this done both me and my father in law got strep throat and that's set us back about five days... but not before he built the island frame. I kinda helped.


Somewhere in there we also got an alarm system installed, purchased all of our appliances for the kitchen, picked a cabinet maker/designer, ordered the wood flooring, had a gas line installed along with some other stuff that I know I'm forgetting. More to come!


Tuesday, June 25, 2013

Ready. Set. Go.


So the party has officially started! We closed on the house last Friday and put our first hole in the wall on Saturday morning. It's now Tuesday evening and I've been great about being at the house working every chance I get. I'm trying to set a routine so that I stop working (at home desk job) at 5pm and heading straight over to the house to start working (back breaking manual labor job). This entails starting working before 8am and eating lunches at my desk so that I can fit everything in. So far I've been doing great with this new schedule but it's only my second weekday so we'll see. 

So here's a quick recap of what we've done so far...

Saturday:

While we're confident of which walls are load-bearing, we still needed to meet with an architect to make sure we're putting in the correct sized beams and columns to support the structure where it needs to be supported. We met with the architect early on Saturday morning so that he could look at the plans, see what we want to do and take some measurements. Everything is good to go and we now know what size beam needs to be installed... I use the term "we" lightly here, because by "we" I mean my father-in-law; since I don't know anything about this.


(Saturday, June 22)
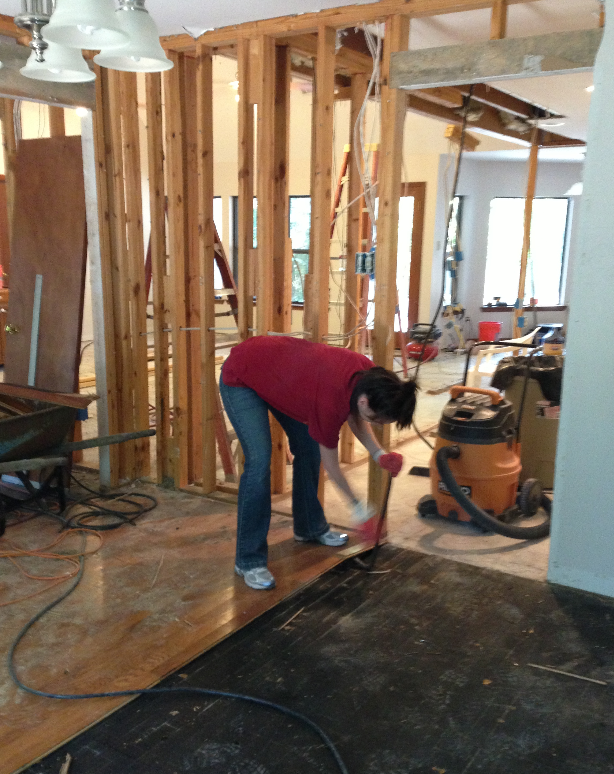
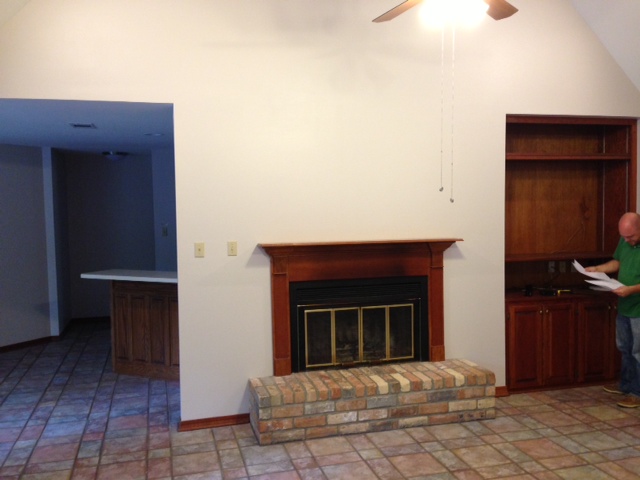
This is the wall between the kitchen and living room, and while it's not load bearing, we still need to support the ceiling with a smaller beam before removing the wall entirely. But the sheetrock, built-ins and fireplace can still go.


First hole of millions.


Which quickly turned into THIS:


Have you ever noticed on HGTV when the homeowners do demolition and they're having the time of their lives and think, "Is knocking holes in walls really that much fun?" YES IT IS. But what's more than fun is the fact that you're really seeing progress on your project. It's exciting because you actually get a glimpse of what it's going to look like when it's done and your ideas start to become real. 

Here's a picture of the other side of the wall, the kitchen, after we removed most of the cabinets....

Not all of the pictures are in the order that they
actually happened, but they're close.


Here's me opening up the pantry.


During demo you find things, especially in older
houses. We found this, a glass coke bottle, a dead
bird and a dead mouse.... so far.


Here's the kitchen a little later.


And the fireplace side of the wall. 


Sunday:


We were able to get our hands on an air chisel and a compressor, thanks to my brother-in-law. He also kindly let us use his shop-vac and HUGE trailer to move materials. I think he's jealous he can't be here to do some work so he's letting us use his stuff because technically that makes him here.. right?

Anyway, the chisel is coming in very handy for taking up the ceramic tile all over the house. It does leave the glue marks on the floor which we'll have to remove later with another machine we'll rent from Home Depot. It's slow progress but it's keeping us under budget in the long run. The cost to have someone come in and remove the tile was $2/sq. ft. At almost 1,000 square feet in tile it makes a ton of sense to this ourselves. Even renting a chisel is more cost effective (and time consuming) than hiring someone. If you do rent one, get one that allows you to stand and chisel. Not only are they more powerful and faster, but the one that we have (about the size and shape of a handgun) sends sharp fragments of ceramic tile flying at your face.

We also bought a first aid kit.

By the end of Sunday night we made some progress.

Half the floor in the living room is done.


It looks clean because it is. We didn't have a dumpster delivered until Tuesday morning so all of our debris was going out onto the carport. The carport filled up quickly. 

Monday consisted of removing the fir down from above where the kitchen cabinets used to be and removing the rest of the tile from the living room (which I don't have a picture of).

Fir downs are usually filled with a ton of
insulation. I found it was easiest to remove
some sheetrock little by little, vacuuming
as I go.

Gone.


Dumpster Tuesday:

We finally got our dumpster delivered... It was supposed to be delivered on Monday morning but it was a day late. A minor setback I was happy because the carport was starting to get pretty full. Tuesday was spent loading the dumpster up. We ordered a 30 cubic-yard dumpster that cost us about $430. 


El's brother and I also got ambitious and removed the tile from the kitchen as well (which I didn't get a picture of).

So far it's been a learning lesson. While I feel like we've made a lot of progress, I was quickly brought back to reality when my brother in law told me that 5 men could have easily done in a single day what we've taken 4 days to do. Thanks, dude.